In this post we will look at how you can debug your PowerShell scripts using VSCode and the PowerShell Editor Services extension for VSCode. As a pre-requisite see the post Getting Started with Visual Studio Code for Use with PowerShell on how to install VSCode and the PowerShell extension for VSCode.
One disclaimer about debugging PowerShell script in VSCode before we start. Even though VSCode is cross-platform, running on Windows, Linux and Mac OS, the debugging support provided by the PowerShell Editor Services extension currently runs only on Windows. PowerShell MVP Adam Driscoll has been working on enabling debug support on other OS’s by means of remotely connecting to the extension running on a Windows machine from Linux or Mac OS. I’ll let Adam cover the details of how that works when it releases in a future drop of the PowerShell Editor Services extension. Now let’s get started debugging PowerShell scripts!
Open VSCode and then use File menu, Open Folder… to open the following folder:
C:\Users\<username>\.vscode\extensions\ms-vscode.PowerShell-<version#>\examples
In the Side Bar on the left, click on the Explore tab and then open the file DebugTest.ps1 e.g.:
Put the cursor on line 17 and press F9 to toggle a breakpoint on. Or you can also click in the left gutter (to the left of the line numbers) to set a breakpoint.
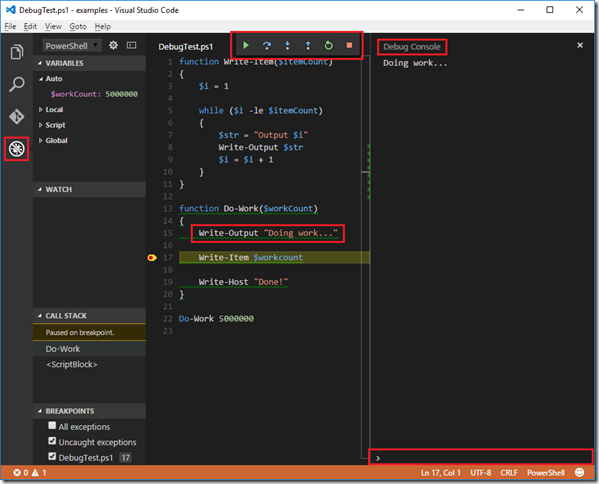
To start debugging, press F5. Your editor should now show the Debug viewlet in the Side Bar as shown below (sans the red boxes). Note: you can pull up the Debug view at any time by pressing Ctrl+Shift+D (on Windows).
I want to point out a number of features above. First, note the “no bug” icon in the left-most area of the Side Bar. You can click that to bring up the Debug viewlet as well. When the debugger is running, the debug toolbar at the top center of the VSCode window will be visible. You can use this toolbar to start/stop debugging and step through your code. The step buttons use the familiar keyboard shortcuts F10, F11 and Shift+F11.
Notice that the editor, in the image above, is showing that script execution is paused on line 17 where we placed our breakpoint. In the Call Stack section of the Debug viewlet, you can see that the debugger is one level down in the Call Stack – inside the Do-Work function. Finally, notice the “Debug Console” window on the right. This is a REPL that, for now, is only available when you are debugging. It is displaying script output “Doing work…” from the function Do-Work. At the bottom of the Debug Console is a prompt from which you can modify variable values and execute PowerShell commands.
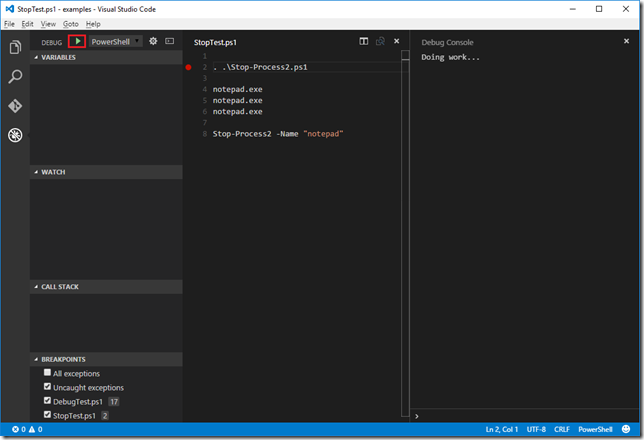
Now press the “Stop” button in the debug toolbar or press Shift+F5. Let’s try debugging another script in this folder. Type Ctrl+P and then “Stop”, select StopTest.ps1 from the list. Set a breakpoint on line 2. Your VSCode editor should look like this:
Press the green “Start” button or press the F5 key to start debugging. You will probably be surprised to find that the debugger started up the DebugTest.ps1 script and hit the breakpoint on line 17 in that script. Why did it do that?
VSCode’s Debug Configuration File – launch.json
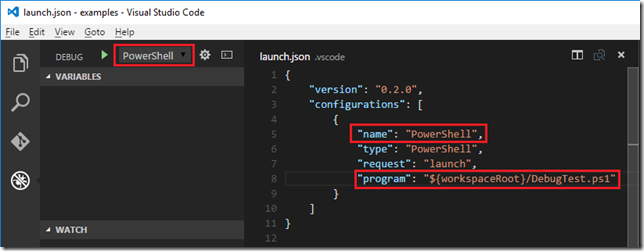
The way VSCode knows how to start a debug session, including which file to start debugging, is a JSON settings file called launch.json. In the PowerShell extension’s Examples directory you will find a folder name “.vscode” with this file in it. The extension comes “pre-configured” with this launch.json file. Let’s look at its contents. Don’t bother trying to navigate to it from VSCode. You can access it directly by pressing the “Gear” icon in the Debug viewlet’s toolbar e.g.:
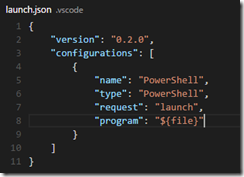
That will open (or create) the launch.json for the open folder. You should see this:
Note that the name “PowerShell” in the launch.json file corresponds to the name in the drop down list in the Debug viewlet’s toolbar. When that name is selected (for now it is the only name available) and you start the debugger, the “program:” setting in launch.json for that configuration determines which script is started by the debugger. Pretty obvious now why DebugTest.ps1 was started, eh? Let’s change that. Modify the launch.json file to the following:
{
    "version": "0.2.0",
    "configurations": [
        {
            "name": "PowerShell",
            "type": "PowerShell",
            "request": "launch",
            "program": "${workspaceRoot}/DebugTest.ps1"
        },
        {
            "name": "StopTest",
            "type": "PowerShell",
            "request": "launch",
            "program": "${workspaceRoot}/StopTest.ps1"
        }
    ]
}
Save the launch.json file.
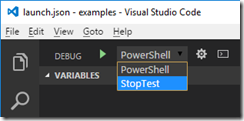
Now open the drop down list in the Debug viewlet’s toolbar and select StopTest e.g.:
Press F5 to start debugging and if your breakpoint in StopTest.ps1 was still set, the debugging will stop at that breakpoint.
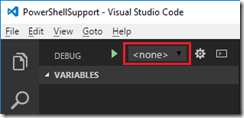
Let’s see how this works from one of your own script folders where there is no launch.json file – yet. Open one of your folders (File | Open Folder…) that contains a script you would like to run under the VSCode debugger. Open the Debug viewlet (Ctrl+Shift+D) and you will see “<none>” listed in the toolbar:
It will display <none> when it can’t find a launch.json file in the folder. We can easily create a new launch.json file by clicking on the gear icon to the right of this drop down list. From the list “Select Debug Environment”, select “PowerShell”. VSCode has now created a sub-folder called .vscode with the file launch.json in it. The file initially contains:
In this file, the “program:” setting is set to “${file}”. In theory, this is what the extension would ship with by default. If only it worked as expected. That is, start debugging the currently open, active script file. But alas, there be bugs here. ![]()
Type Ctrl+Shift+P and then type “rel” and press enter. That will reload the editor. Now open up one of your scripts and set a breakpoint near the top and press F5 to start debugging. Note that indeed the debugger started debugging this file. Cool, just what we wanted. Now open a different script file and set a breakpoint and press F5. Doh! The original file was started (unless the VSCode team has fixed this bug). This is why I had you reload the window. The value of ${file} seems to get stuck to the first file that was open and active when you first started debugging. A bug has been filed against VSCode regarding the behavior of this variable.
Personally, I find it easier to just reload the editor than to have to edit the launch.json file for every different script in a directory that I want to debug. So I will leave the default of ${file} and hope the VSCode team fixes the bug in a future release.
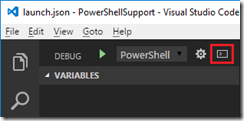
Let’s wrap up with a few more minor tips. To toggle the Debug Console open and closed, click the Debug viewlet toolbar button shown below:
Regarding the Debug Console, there seems to be a bug where carriage return and line feed gets rendered as text “\r\n” instead of an actual carriage return or line feed. Hopefully this issue gets resolved in a future update to either VSCode or the PowerShell Editor Services extension.
Watch Window
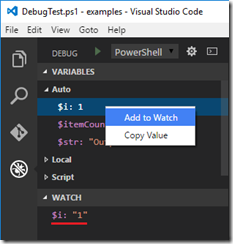
To watch a variable, right click on it in the Variables section of the Debug viewlet as shown below:
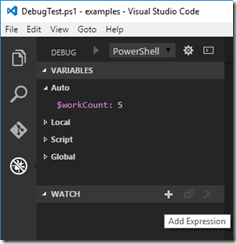
You can also click on the “+” button in the Watch section’s toolbar (or right-click in the Watch section and select “Add Expression”) e.g.:
Typically you would provide a variable name but as “expression” implies, it can be an expression such as “$i + 2″. You can even put in commands like Get-Date and it will execute them.
That’s a wrap on using VSCode and the PowerShell Editor Services extension to debug PowerShell scripts. Hopefully you found this post useful and will enjoy using the PowerShell Editor Services powered debugger in VSCode on your PowerShell scripts. If you find an issue, please submit it on the PowerShell EditorServices GitHub site.



nice post. Have you seen that VSCode starts 32bit PS session during debugging as VSCode runs in 32bit ? Wonder how this will work for PS Workflows which do not work in 32bit PS session.
PowerShell MVP Adam Driscoll checked in an update to the extension a few days ago that builds both a 32-bit and a 64-bit host. So I believe you will be able to chose the host (x86 or x64) via the Debugger command drop-down before you start debugging.
It provide debugging capabilites, but you can at least get to see the output of your script on linux (assuming gnome-terminal is installed) with the following launch.json properties:
“program”: “/usr/bin/gnome-terminal”,
“args”: [“-x”, “/usr/bin/powershell”, “-NoExit”, “-f”, “${file}”],
This will open a gnome terminal and launch powershell calling the active file in vs code.
I have a script that requires a module to be loaded. I usually load the module with my profile in Powershell ISE. How would I do this with visual studio code? I don’t know how to get the debugger to load modules.
You can always import your module at the beginning of the script you are debugging. You can create a Microsoft.VSCode_profile.ps1 file in your ~\Documents\WindowsPowerShell directory and import the module in that profile script. That used to only support loading modules during editing but since we now use the same PowerShell instance for debug, it might work there as well.
Hi,
I’m trying to do this, however, the module loads in the ‘output’-tab, so hotkey works and cmd-lets from module works. Intellisense also works for the cmd-lets in the module. After adding loading the module in the default (user) PowerShell profile, the ‘terminal’ also works.
But I’m not able to get the module in the debug phase – don’t know if this is a misconfiguration on my side, or a bug (so I need to file it). I’ve been searching for a while now, cannot find a solution.
Cheers.
Bouke
Check out part 2 of this blog post – https://blogs.technet.microsoft.com/heyscriptingguy/2017/02/06/debugging-powershell-script-in-visual-studio-code-part-1/. Part 2 should go live on Monday. Also, make sure you update VSCode to 1.9.1 and the PowerShell extension to 0.9.0. After that you can attach the debugger to an external PowerShell console (or PS in the VSCode terminal). Then you can import the module and debug the import phase or module command execution.
Great post, it’s more sufficient in VS Code than with ISE